


Good organization of your electronic files requires two key elements. First you need a logical and consistent folder hierarchy. Each client or project folder should have identical, or at least similar, folders corresponding to that particular client. Second, you need a consistent file naming procedure to organize files within each folder.
Many people include dates in file names in an attempt to organize their folders and find what they're looking for with a glance. However, too often people fall into the mm/dd/yyyy trap of dating their files. I get it, we're Americans, we were raised writing the date that way. If we were European we would likely name our files dd/mm/yyyy. However, computers are neither Americans nor European. If we want our files to be organized as best they can we need to learn to speak a bit of computer.
Shortfalls of conventional date formats
Your computer wants to organize things alphabetically and in descending order. What this means is that a letter titled 04-12-2010 - Letter to Joe.doc will be placed after 04-11-2010 - Letter to Jane.doc and before 04-15-2010 - Letter to Jim.doc. That's great so far, but we run into trouble when we change years. For example 04-12-2011 - Letter to Joe.doc when placed in the same folder will result in sorting like this:
04-11-2010 - Letter to Jane.docThe dates become jumbled. Our British friends' folders, would be even more chaotic. And people who put their dates at the end of the file name run into even more of a mess by sorting first by recipient then by date. Fortunately, the solution is simple. We change our date format to a YYYYMMDD format.
04-12-2010 - Letter to Joe.doc
04-12-2011 - Letter to Joe.doc
04-15-2010 - Letter to Jim.doc
A better date format method
Some people like YYYY-MM-DD, some like YYYY.MM.DD. I prefer YYYYMMDD because as applied to my preferred naming convention this method results in the least visually cluttered names.
In my folder the above examples would be formatted as:
20100411 - Letter to Jane.docMuch better right? But I'll be the first to admit that it's kind of a pain to write out those numbers and place them in front of each file name. Again, there is a simple solution, though it is likely a bit intimidating to the average Word user.
20100412 - Letter to Joe.doc
20100415 - Letter to Jim.doc
20110415 - Letter to Joe.doc
Scripting a solution
Mike has previously written on some of the basics of scripting here. By default Word's suggested Save As filename is the title of the document. Most users probably know that when they first "Save As" a document word picks up the first few words as a suggested file name. Behind the scenes word is actually substituting those words for the document's title field if no title has been defined.
The following script will define the title of the document as the current date in yyyymmdd format whenever a new file is opened:
Private Sub Document_New()

With Dialogs(wdDialogFileSummaryInfo)
.Title = CStr(Format(Now(), "yyyyMMdd "))
.Execute
End With
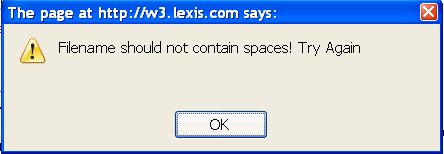
End Sub"yyyyMMdd " to "yyyy-MM-dd " or "yyyy.MM.dd ". However, avoid front and back slashes as they are not valid characters for file names.To apply this script we need to add it to whatever template that you base your documents on. If you want all of your documents you need to add it to your normal.dotm file.
- Open your normal.dotm template (or whatever template file you wish to apply this behavior to).
- Press alt+F11 to bring up the visual basic editor. If you have several files open you may see multiple projects on the left of the screen. (If you don't see the Project Viewer screen press Ctrl+R).
- Double click "ThisDocument" in the "Microsoft Word Objects" folder of the "Normal" project.
- Paste the above code in the code window.
- Save your work and close the Visual Basic editor.
 and clicking Quick Parts
  and then selecting Date from the Field names list (you can use SaveDate if you want - see
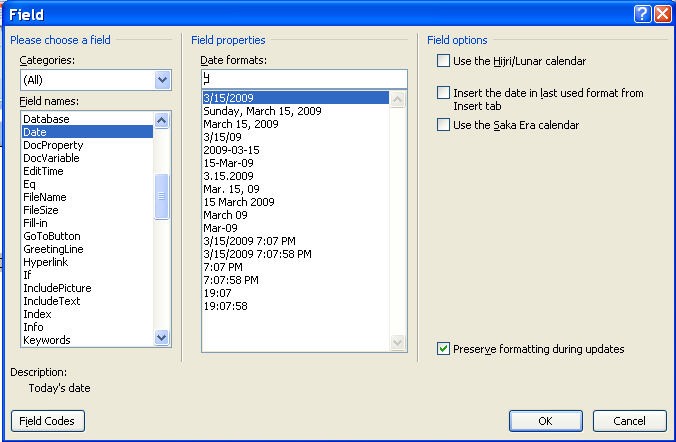


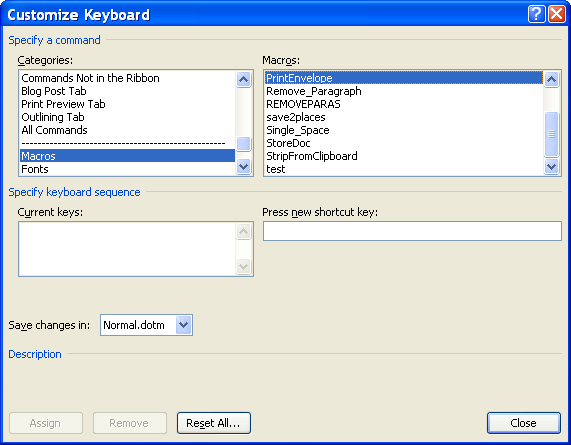
 Then click on Word Options at the bottom of the menu that pops out. Then hit the Customize tab. Finally, at the bottom of the Customize window, hit the customize keyboard shortcuts button. In the Categories box, scroll down to Macros. Then, in the Macros box, select our PrintEnvelope macro. Now, click in the Press New Shortcut Key box. Type the key combination that you want to assign to the macro. If the key combination is already used it, the window will show text that says "Currently assigned to." Usually I just replace what was assigned by the Microsoft people because they have shortcuts for features I will never use. Finally, hit the Assign button (don't forget this - I do all the time).