


So its that time again and the poor first years are writing briefs in Appellate Advocacy. One of the most frustrating things was creating a table of contents and table of authorities and have all the pages right - especially forgetting to update after an edit.
Auto Generate Table of Authorities
West provides a utility called WestCiteLink that takes the pain out of the table of authorities. There is a Firefox plugin called CiteGenie that is supposed to take the pain out of citation. Bill recommended CiteGenie but I haven't had the time to test it.
Auto Generate Table of Contents
Word has a function that will generate your table of contents automatically. To use it we first have to become familiar with styles. In Word 07, you can find the styles buttons under the Home heading (because the first thing I think of when I think "Home" is styles and fonts etc. - good job M$). In earlier versions of Word, styles can be found under Format->Styles and Formatting (now that makes sense). We are going to be using the heading styles that look like this:
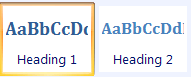
Type some text into a blank word document, highlight the text, and then click on the style you want to apply. As a result, your text looks like the style you selected:
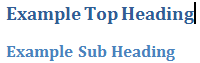
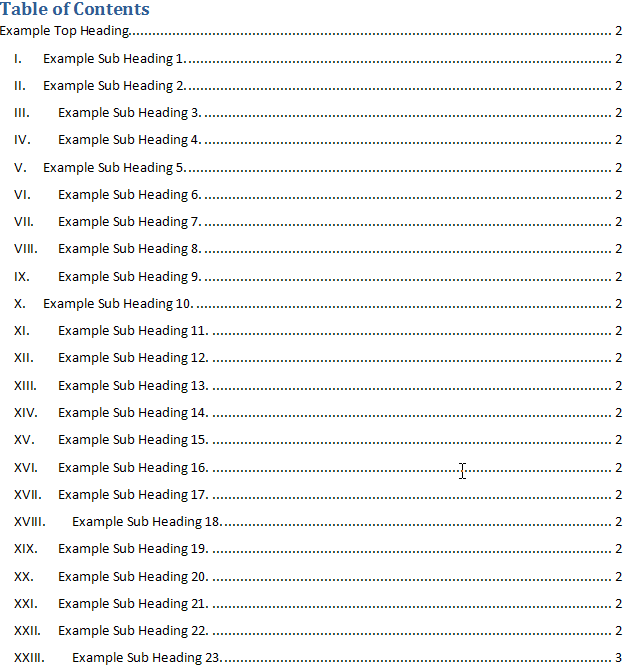
I have created two headings, one with the Heading 1 style, and the other with the Heading 2 style. Word will put all my headings that have been set to a certain style into a table of contents, complete with page numbers.
First click at the place in the document where you want your table of contents. Go to the References tab in Word 07 (go to Insert->Reference->Index and Tables in earlier versions of Word). Then click on Table of Contents:

Then select one of the Automatic tables. Your table of contents is automatically generated.
Customizing Your Styles
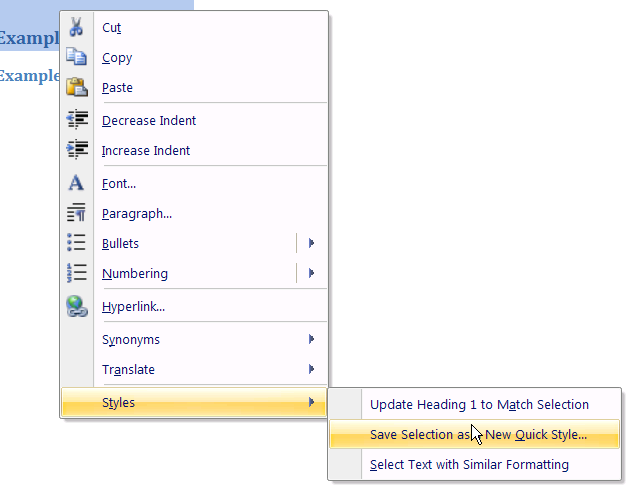
Its probably not a good idea to have your brief headings the funky colors, sizes, and fonts that Word defaults to so we will want to customize the heading style.
In Word 07, highlight your heading, right click on it, and select Styles->Save Selection as New Quick Style (in earlier versions, right click in the styles menu and select modify):
Under name, type a name for your style. Then click Modify. The modify window will pop up and you can set the font, size, and color settings the way you want them.
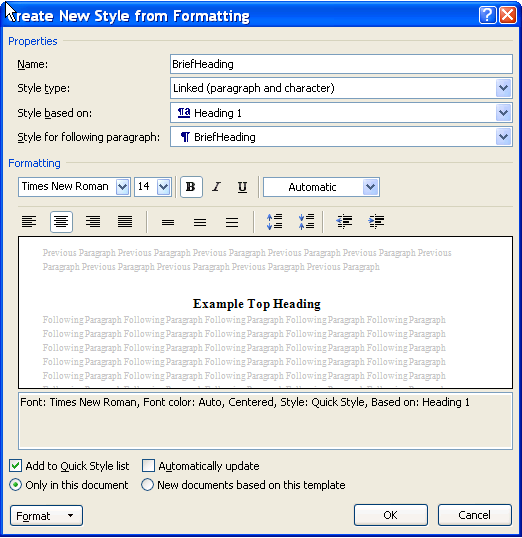
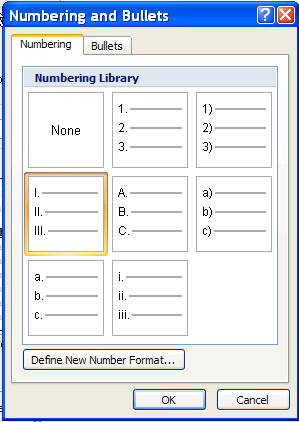
For numbered headings, click the Format button and select Numbering. In the Numbering window, pick the numbering type you want.
When all is finished, you can simply add more headings and then right click on your table of contents and hit update table.
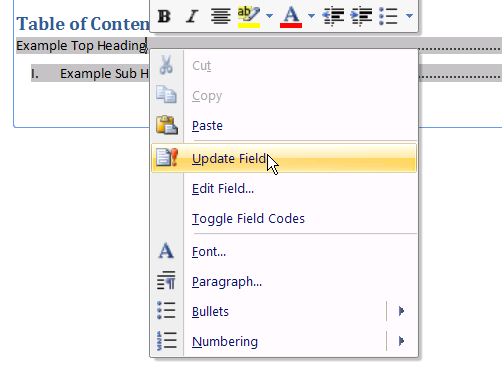
Then select Entire Table (don't just update page numbers). Your table will automatically add the new headings and the right page numbers.
Auto Generate Table of Authorities
West provides a utility called WestCiteLink that takes the pain out of the table of authorities. There is a Firefox plugin called CiteGenie that is supposed to take the pain out of citation. Bill recommended CiteGenie but I haven't had the time to test it.
Auto Generate Table of Contents
Word has a function that will generate your table of contents automatically. To use it we first have to become familiar with styles. In Word 07, you can find the styles buttons under the Home heading (because the first thing I think of when I think "Home" is styles and fonts etc. - good job M$). In earlier versions of Word, styles can be found under Format->Styles and Formatting (now that makes sense). We are going to be using the heading styles that look like this:
Type some text into a blank word document, highlight the text, and then click on the style you want to apply. As a result, your text looks like the style you selected:
I have created two headings, one with the Heading 1 style, and the other with the Heading 2 style. Word will put all my headings that have been set to a certain style into a table of contents, complete with page numbers.
First click at the place in the document where you want your table of contents. Go to the References tab in Word 07 (go to Insert->Reference->Index and Tables in earlier versions of Word). Then click on Table of Contents:
Then select one of the Automatic tables. Your table of contents is automatically generated.
Customizing Your Styles
Its probably not a good idea to have your brief headings the funky colors, sizes, and fonts that Word defaults to so we will want to customize the heading style.
In Word 07, highlight your heading, right click on it, and select Styles->Save Selection as New Quick Style (in earlier versions, right click in the styles menu and select modify):
Under name, type a name for your style. Then click Modify. The modify window will pop up and you can set the font, size, and color settings the way you want them.
For numbered headings, click the Format button and select Numbering. In the Numbering window, pick the numbering type you want.
When all is finished, you can simply add more headings and then right click on your table of contents and hit update table.
Then select Entire Table (don't just update page numbers). Your table will automatically add the new headings and the right page numbers.
Excellent! Very very helpful indeed :)
ReplyDelete