This will be the first of a series of posts on cool Microsoft Word macros I have been using to make me more efficient at producing documents and cut down on embarrassing errors. Bill and I have been
preaching the benefits of macros for a while on this blog. Check
this post out for an introduction.
I use templates for all of my commonly used documents, from my basic letter or fax template to more complex pleading documents. I have discussed
how to create templates before. Word allows you to insert blanks called fields in a document. These fields will automatically fill in information at certain times. In many of my templates I have fields that automatically fill in the date or
generate tables of contents, among other things. These fields all need to be manually updated by right clicking on them and clicking update. Sometimes I forget to update the field before printing so I created a macro to automatically update the fields when I hit the save button. Credit goes to these blog posts:
1,
2.
For experimentation, create a template using the procedures from the
creating templates tutorial. Then insert a save date field in that template.
In Office 2007, you go to the Insert tab on the Ribbon bar 
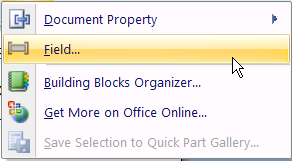
. Next, go to the Quick Parts button

.
Then select the Field menu item.
In the Field dialog, select SaveDate. Select whatever date format you desire.
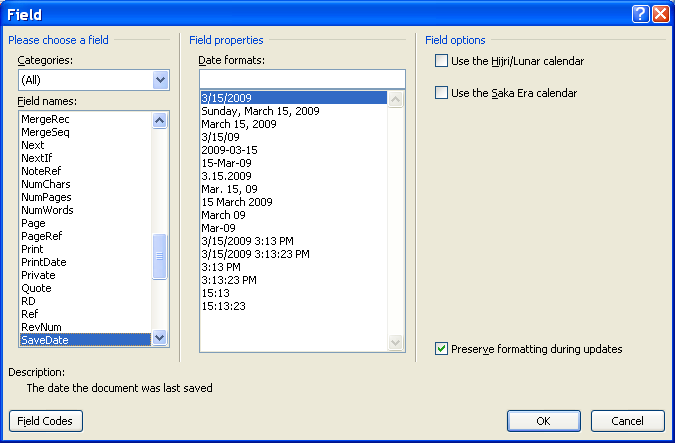
A SaveDate field displays the date the document was saved (after it is updated) and, thus, is handy for letters and other documents that are printed and sent on the date they are saved.
Now lets bring up the Visual Basic editor so we can start adding some code, type Alt + F11. In the Project window on the left, find the letter project and right click on it. Next click insert -> module.
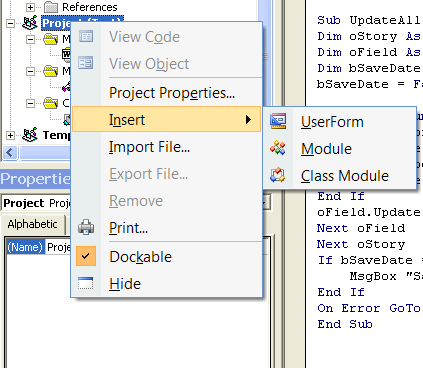
A new item called a code module will be inserted under your project in a modules folder. It will be named Module1.
Now insert a new class module just like you inserted the code module. The class module will be named Class1.
Your Project window should look like this:
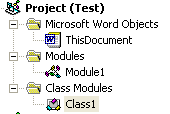
The specifics of what ThisDocument, Module1, and Class1 are not very important at this point so I wont go into detail. We will just paste code to make things work. If you have a desire to understand code, see
here.
Double click on the ThisDocument icon in the Project window. Now paste the following code into the code window:
Private Sub Document_New() 'has to be Document_New not Document_Open for it to work in a template
Call Register_Event_Handler
End Sub
Now double click on the Module1 icon and paste this code in:
Dim X As New Class1
Public Sub Register_Event_Handler()
Set X.App = Word.Application
End Sub
Finally, paste this code into Class1:
Public WithEvents App As Word.Application
Private Sub App_DocumentBeforeSave(ByVal Doc As Document, SaveAsUI As Boolean, Cancel As Boolean)
UpdateAll
End Sub
Sub UpdateAll()
Dim oStory As Range
Dim oField As Field
Dim bSaveDate As Boolean
bSaveDate = False
On Error Resume Next
For Each oStory In ActiveDocument.StoryRanges
For Each oField In oStory.Fields
If oField.Type = wdFieldSaveDate Then
bSaveDate = True
End If
oField.Update
Next oField
Next oStory
If bSaveDate = True Then
MsgBox "Save a second time to update a save date field"
End If
On Error GoTo 0
End Sub
SaveDate fields present a special paradox. The document has to be saved before the field can be updated. I have the following code to remind me to press save twice to update the field:
If bSaveDate = True Then
MsgBox "Save a second time to update a save date field"
End If
Now save the template and double click on the template file to create a new document using that template. When you hit save the message box will remind you to save a second time, and when you do, the date field will be updated automatically.
This same code will automatically update tables of contents, numbering and any other Word field that automatically generates information.


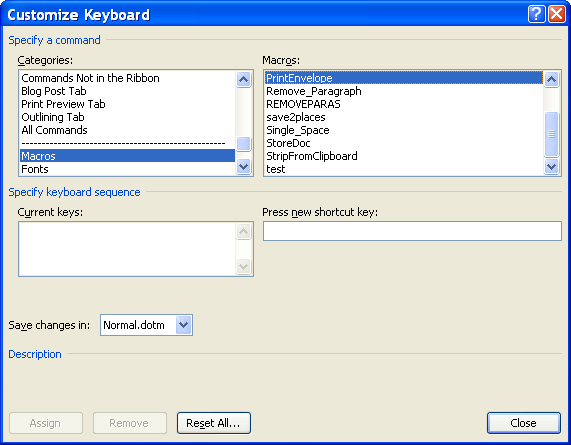
 Then click on Word Options at the bottom of the menu that pops out. Then hit the Customize tab. Finally, at the bottom of the Customize window, hit the customize keyboard shortcuts button. In the Categories box, scroll down to Macros. Then, in the Macros box, select our PrintEnvelope macro. Now, click in the Press New Shortcut Key box. Type the key combination that you want to assign to the macro. If the key combination is already used it, the window will show text that says "Currently assigned to." Usually I just replace what was assigned by the Microsoft people because they have shortcuts for features I will never use. Finally, hit the Assign button (don't forget this - I do all the time).